
These API Guides are a great place to start when you're looking to understand and use any of the Mitel APIs. While they don't go into full detail on every operation or resource, they will explain the main principles, walk through common uses, and act as a supplementary resource to the primary API Documentation.
Admin API Guide
The Admin API is typically used for getting information about or otherwise managing your CloudLink account. The Admin API allows you to do things like:
Create a 'Client' for authentication purposes
Create and manage users
Manage accounts
Create and manage organizational entities such as groups and sites
Upload user photos
There are quite a few components to the Admin API, though it’s all really very logical and straightforward. Most components can be read, created, updated, and deleted provided that you have the appropriate permissions. There are some exceptions where the permissions required are only held by Mitel staff, and for this reason we have not discussed those components here in this guide although you may seem them referenced in the API documentation itself.
These are the components that you can work with as a Mitel partner:
Object Model
Accounts
In addition to managing your own Partner account, you can also view and manage accounts for your customers. When working with an account, it is recommended that you only use GET and PUT operations to view or update existing accounts. When you need to create a new account, best practice is to use the Accounts app/portal since creating a properly functioning account requires additional operations that you will not have access to through the API.
Users
Users are of key importance, as I imagine you want people to actually use your app. Users are able to obtain access tokens which will be required in order for that user to actually interact with CloudLink (e.g. send or receive chat messages). Most user properties are self-explanatory and explained in more detail in the API Documentation, however users can be assigned one of three roles:
PARTNER_ADMIN - Grants full access to your Partner account and any customer accounts. ACCOUNT_ADMIN - Grants full access to a specific account USER - Grants basic user rights within a specified account. A user can create conversations, send messages, execute call control, and most other tasks you would need to perform within a client application.
In addition to creating, updating, and deleting Users you can also send welcome emails and temporary access codes for applications that require their use.
Clients
Clients are typically used to represent a server side application, as opposed to a user. A client can obtain an access token and be granted any of the same roles that can be assigned to a user.
Sites
Sites are meant to represent geographical locations can be assigned an address, map coordinates, timezone, and specific dialing rules (inbound/outbound digits). Sites can be useful as a kind of directory, or to obtain the appropriate dialing rules needed to dial into our out of the location without needing to hard code the values. You can associate Groups to a site.
Photos
Photos can be assigned to Users, Contacts, and Groups. When performing a GET operation on one of those objects, the URL for the uploaded photo will be provided in the response body.
Contacts
Contacts are used in different ways by different Mitel applications. In the event that your CloudLink account is connected to a supported PBX through a CloudLink Gateway, contacts are synced from that PBX. There are a variety of contact types, some of which are purely administrative and assigned to the account itself, such as the MAIN_CONTACT and TECHNICAL_SUPPORT contact. The contact types you will be working with the most often are:
CORPORATE - Considered a generic contact, these will include those synced from the PBX. PERSONAL_CONTACT - Used by the MOWA application and pulled from Office 365. Only accessible by the user who created the contact. GUEST - Used by MiTeam Meetings, this contact type can obtain a guest token for the purpose of interacting with CloudLink services.
Entities
While not considered a unique object, entities are considered to be Users, Contacts, Groups, or Clients. The purpose of entities is to provide an easy way to pull a list of all the aforementioned objects with a single API call, or identify an object when all you have is the UID (userID, groupID, etc).
Groups
Similar to Contacts, groups are synced if you have a supported PBX connected to the CloudLink account through a CloudLink Gateway. Groups are primarily considered a PBX concept as they are dialable and contain members that calls can be routed to.
Members
For practical purposes, members are analogous to Users and are assigned to Groups. The operations available for members focuses on assigning, removing, or retrieving a list of members within a specified group.
SCIM
Short for System for Cross-domain Identify Management, SCIM is an open standard to allow automated user provisioning. Currently Mitel allows you to create a SCIM based integration with Azure AD and OKTA AD through the CloudLink Accounts app, however you could create your own integration with a different Identity Provider that supports SCIM using the API. You can use POST /accounts/{accountID}/scimkey to obtain the appropriate secret key.
Use Cases
Client for Authentication
When your application needs to authenticate against CloudLink, but is not acting on behalf of a specific user, you can create a Client that can be granted tokens and function in a similar capacity to a user. The benefit is that you do not need to create 'dummy' or 'service' users and you are not required to make use of the Authorization Code Flow but can instead use the simpler OAuth grants. While the Authentication API Guide has a section on how to obtain an authentication token for a Client, you first need to create the client with the following:
POST /accounts/{accountId}/client
{
  "name": "My App Client",
  "role": "ACCOUNT_ADMIN",
  "type": "DEFAULT",
  "active": true
}
Optionally, you can specify the "clientId" yourself in the request body. If you do not include one, it is generated for you automatically.
User Photos
The Tutorials section contains a walk through of how to manage user photos in CloudLink.
Limitations
The following limitations should be noted when working with the Admin API:
Sync with the PBX is one-way and changes made to a synced object (i.e. users) in CloudLink will not be pushed back down to the PBX.
Authentication API Guide
The Authentication API is a service that grants JSON Web Tokens, which in turn grant access to the various Mitel APIs. It’s basically the bouncer of the Mitel API Club. It doesn’t care who you know, you better be on the token list or you’re going to be standing out in the cold. Except Frank in Accounting, he’s banned for life and he knows why.
IMPORTANT: Tokens should never be manually decoded. This practice can result in your CloudLink account being temporarily suspended.
The Authentication API is something of an outlier when compared with the other CloudLink APIs in that you will largely rely on this guide and use the full API documentation for supplementary information instead. This may change as we continue to improve our documentation.
The Authentication API is also used as part of the deployment process when you assign your application to a specific account. There is other functionality available, however for the most part those routes are only used for very specific functions by Mitel apps and will not be covered in this guide.
Object Model
The Authentication API has a very straightforward object model, what really matters is how you interact with these objects when authenticating in different scenarios. For that reason we will limit this section of the guide to discussing Bearer Tokens which will be relevant to most use cases, and Applications. Details of other resources will be discussed in the context of their specific use cases.
Bearer Tokens
Bearer Tokens are granted to a user, client, or guest to provide appropriate levels of access to the various CloudLink APIs based on the bearer's role. Bearer Tokens consist of an Access Token and Refresh Token:
access_token - Used for authentication when making any API call. Expires after the time indicated by the 'expires_in' property (in seconds).
refresh_token - Can be exchanged for a new access token after the old one expires without having to resubmit credentials.
Applications
Applications represent both Mitel branded and custom applications and are represented by a unique 'clientId' that is used as part of the Authorization Code Flow described further on in this article. As part of the deployment process you may be required to manually activate your application on the account where it is being deployed, and you may also need to update an Application record with the desired redirects for your user login flow.
Important: Applications should be managed by a user with a PARTNER_ADMIN role.
When creating or updating an application there are several key properties to be aware of:
applicationId - Referred to in various documentation as the 'clientId', this is used as part of the Authorization Code Flows.
name - Name of the application
active - Boolean, indicates if the application is enabled on the account
description - Brief text description of the application
redirectUris - Array of available redirect locations (URIs) for users when redirecting back to the application from the Mitel Auth Portal (when used). These are managed on the Partner's CloudLink 'Prime Account'.
Use Cases
User Auth - Development Only
User authentication to obtain a bearer token can be accomplished through a simple OAuth 2.0 grant, however this method should only be used during initial development when your application does not yet have its own clientId. Users should always follow the Authorization Code Flow when authenticating against CloudLink once a clientId has been issued for your application.
POST /token
{
   "grant_type": "password",
   "username": "user.name@mitel.com",
   "password": "CloudLink4Lyfe!",
   "account_id": "105444491"
}
Note: account_id should be supplied as a best practice, but is not required if the user only exists in one CloudLink account.
Authorization Code Flow for Users - Auth Portal
The Authentication API uses the /authorize routes to securely authorize both the application and the user attempting to utilize the CloudLink platform. This is done by providing important identifying information, which returns an authorization code that can be exchanged for a bearer token. Using this workflow requires that your application has been registered, approved, and issued a unique application identifier (clientId).
A convenient way to use this flow is to simply redirect your users to the Mitel Auth Portal and provide the appropriate parameters. Here's an example:
https://auth.mitel.io/authorize?
client_id=bca4584614724174b8290bdd6c7d5967
&response_type=code
&redirect_uri=https://mycoolapp.com/loginsuccess
The 'redirect_uri' value must be pre-configured on the Application for the referenced clientId or an error will be returned. Users will be prompted for their CloudLink credentials, and optionally their accountId. They also have the option to login via SSO when that feature is enabled on the account.
Important: For accounts using SSO, you must authenticate with the Mitel Auth Portal.
Authorization Code Flow for Users - Custom
The Authentication API uses the /authorize routes to securely authorize both the application and the user attempting to utilize the CloudLink platform. This is done by providing important identifying information, which returns an authorization code that can be exchanged for a bearer token. Using this workflow requires that your application has been registered, approved, and issued a unique application identifier (clientId).
If you do not wish to leverage the Mitel Auth Portal (described above), you can recreate the same authentication workflow within your app, starting with the /authorize route. The request body schema is application/x-www-form-urlencoded and contains quite a few fields, however there are only a few which are relevant to a third party developer (that’s you). While the formal documentation only lists the first two fields as required, in practice additional fields should always be used so the ‘required’ fields listed here may differ somewhat from the formal documentation:
client_id - This is a unique, pre-existing ID that identifies the application making the request (required)
response_type - This will always be ‘code’ (required)
username - The user’s CloudLink username (required)
password - The user’s CloudLink password (required)
account_id - The user’s CloudLink Account ID. If the user exists in multiple accounts, this becomes a required field. The API will return an HTTP 409 error if this is true and the account is not specified.
redirect_uri - Where the auth code (and user) will be returned to. Only required if using the redirect to the Mitel Auth portal, as otherwise the code is returned to whomever is making the API call. These values must be pre-registered and not only associated with your app but also associated with a specific account.
code_challenge_method - An optional additional layer of security using a Proof Key for Code Exchange (PKCE). Only ‘S256’ is supposed at this time.
code_challenge - PKCE code (SHA-256). Used in conjunction with ‘code_challenge_method’, this will need to be provided again when requesting an authentication token later on.
Id_token_hint - Used as a way to get an authorization code when moving between applications using a refresh token (so you don’t have to login twice). This replaces the username/password.
target_client_id - Used in conjunction with ‘id_token_hint’, this is the clientId for the application the user is switching to.
Here's a simple example:
POST /authorize
"clientId": "abcdefgh165894ndsuaid1237846"
"response_type": "code"
"username": "user.name@mitel.com"
"password": "CloudLink4Lyfe!"
"account_id": "105444491"
"redirect_uri": "https://loginsuccess.mysampleapp.com"
Once you have received the authorization code, you can now exchange it for an authentication token:
POST /token
{
   "code": "674653hgdugsde87c43672bbd2085aa",
   "clientId": "abcdefgh165894ndsuaid1237846"
}
Client Authentication
When making API calls on behalf of a server application instead of a user, it doesn't really make sense to be authenticating as a user. In this scenario you can create a Client object using the Admin API with the desired role:
POST /accounts/{accountId}/clients
{
  "name": "My Cool App",
  "role": "ACCOUNT_ADMIN",
  "active": true
}
Optionally, you can set a value for 'clientId' however one will be auto-generated if you do not specify one. In combination with the 'clientSecret' you're provided with, you can now request a token:
POST /token
{
   "grant_type": "client_credentials",
   "client_id": "04060827bb7b4b4eba0197c0588259d2",
   "client_secret": "44837cb6371c4725b0fea7d8b25757d1",
   "account_id": "105444491"
}
Guest Authentication
When a user from outside of CloudLink needs to interact with a CloudLink service, guest access can be provided. This can be useful for adding outside users to a chat conversation as part of a chat integration, or to provide access to Conferences for third parties. Here's an example of a guest token being created. The 'principalId' is defined by you and utilizing a UUID is the recommended practice:
POST /guest/token
{
    "principalId":"7688c81e-c6ea-4777-a1a2-8163ed318a19",
    "accountId":"105444491",
    "name":"Bob Smith"
}
Single Sign On
SSO is available using SAML. While Mitel only officially supports Azure as an Identify Provider (IdP), in theory you can use the Azure SSO setup in the Mitel Accounts Portal (https://accounts.mitel.io) to add any IdP that support SAML 2.0.
When your account has SSO configured, you will need to use the Authorization Code Flow and make use of the Mitel Auth portal. You cannot recreate this functionality using the Authentication API. When the user provides their username (and optionally account ID), they will be presented with a ‘Single Sign On’ button that will redirect the user to the IdP to provide their credentials.
Conversations API Guide
Do you hate talking to people in person? When your phone rings, does your anxiety spike through the roof? Why couldn’t they just text instead!? Well, have I got an API for you! The Chat (or Conversation) API is a great way to bake messaging functionality into your application, or if you don’t have your own application, store bought is fine. There are a variety of Mitel applications that use the Chat API, so you can easily leverage it to insert messages from an outside source (aka chat federation) or add functionality such as custom routing of messages based on rules you define. This means you could do things like:
Create an application that uses the Chat API to pass messages between your chat client and your choice of social media platform.
Create a ‘Chat IVR’ that routes messages based on the selections the user makes
Build an interactive chat bot
Object Model
Conversation
Considered the ‘core’ object which all other objects belong to, a chat conversation sets the basic properties that control how your participants will interact and what functionality is available. Conversations can are classified as either “direct” (between two participants), “group” (between 3+ participants), or “stream” (topic based). Stream conversations have a property that flags them as such, whereas direct and group conversations are informally labelled as such based on the number of participants involved. The key properties of a conversation that you can control are (as labelled in the JSON request body):
Name - Used for stream conversations, not required for 1-to-1 conversations.
LanguageCode - ISO 639-1 standard language codes, such as “en-US” or “de”
Stream - Stream conversations are considered ‘topic based’ and participants can be added/removed as needed, and the conversation can be private or public. If set to false (the default), a Direct conversation will be created which has fixed participants and is always considered private (see Visibility).
Visibility - Only applies if Stream = true, accepted values are PUBLIC and PRIVATE. Private stream conversations require participants to be invited.
Hidden - If set to true, the conversation will not be searchable unless you explicitly search for hidden conversations.
GenerateSystemMessages - If set to true, system messages such as “Person X has left the chat” will be automatically added to the conversation.
OriginalParticipants - Not to be confused with “Participants” which has been deprecated, this is how you determine who is included in the initial conversation. For practical purposes, the type should always be USER and the participantId is typically the unique identifier for the user, such as the UserId or ContactId (for guests).
AccessCode - At the time this article was published, this isn’t used by Mitel apps. You can use it for your own app if desired to control access to stream conversations.
Conversations can also make use of custom tags to whatever end your heart desires.
Message
Messages are really quite straight forward and (I hope) self-explanatory. There are a few properties that you can set when creating a message:
Body - The actual content of the message itself.
ContentType - Officially, you can use any of the text/* or application/* MIME types, with the most common being text/plain. The API will actually accept almost any value, however it’s up to the chat client to interpret the data. For most Mitel apps, this will be text/plain.
FallbackText - Only required if the ContentType is something other than text/plain. In the event that the body of the message can’t be displayed, or the app doesn’t recognize the contentType, this will be the alternative text to display.
parentMessageID - At the time this article was written, this isn’t really used by Mitel apps, but you can use this for your own purposes if needed. This will let you nest messages under each other indefinitely (similar to how Reddit works).
Tag - Can be set to whatever you like, as long as it’s a string. Only one tag can be set for a message, and the label cannot be changed.
If you’re working with a chat client and keep seeing only the FallbackText, there are a couple possible reasons for this:
There’s a problem with the Body of the message
The chat client can’t handle the contentType that you set. Commonly occurs if the contentType is set to “text/*”.
For more information on content types, such as the JSON schema for action cards, please see this documentation.
Participants
For “direct” conversations (stream=false), participants need to be added when the conversation is created. When you need to modify the participants, a new conversation needs to be created. For stream conversations, you can create a participant and add them to a conversation as needed. The available properties are:
UserID - This is the UserId (or contactId for guests) for the relevant user. If you leave out this field, the API will use the userId associated with the auth token used to make the call (i.e. You).
Status - By default this will be INVITED, however other values are ACCEPTED, DECLINED, and BLOCKED. When BLOCKED, the participant cannot rejoin the conversation.
ConversationVisibility - Different from visibility on the conversation itself, this lets you hide the conversation from the participant without actually removing them. Values are HIDDEN and VISIBLE. This lets a user ‘close’ a conversation in the client but retain the ability to view it again, without worrying about the complications that come with removing them entirely (e.g. you can’t re-add someone to a direct conversation).
ParticipantType - For practical purposes, this should always be USER.
You also have the ability to show a ‘User X is typing’ message in the chat client by using POST /conversations/{conversationId}/participants/{participantId}/typing. You provide the ConversationId and ParticipantId as path parameters, and in the request body indicate either START or STOP for the ‘action’ property. If you’re using your own custom chat client, you will need to determine how the UI handles these events and when to make them appear/disappear.
Participants also have an important property called “lastReadMessageDate” that should be updated to the precise datetime that the last message in the conversation was read. This will update the unread messages count in Mitel apps, and can be used by custom apps to indicate which messages have been read by a particular participant.
Attachments
File attachments in a conversation can be up to 10MB, and operations are limited to GET, PUT and DELETE. Unique to attachments, the PUT operation is used to both create and update attachments, as opposed to separate POST and PUT operations. Attachments also contain metadata which you can use for…reasons. The attachments and the metadata are accessed through different paths and operations, as you’ll see in the API documentation.
When creating attachments, the request body will need to be the binary for the attachment itself. In Postman, you can simply choose ‘binary’ under the Body tab and browse to the file. When you GET an attachment, you will get the same binary data back.
Reactions
In simplest terms, reactions allow a user ‘reply’ to a message with an emoji. When working with reactions, you will typically need to provide the ConversationId and MessageId as a path parameter, and the request body has a single property called “reaction” that will accept any valid unicode character.
Commands
Commands are unique in that they are not associated with a particular conversation, but are instead associated with your account. Commands can be invoked from the chat client to perform various actions, such as:
WHO - Runs a GET Participants for the provided conversationId KICK - Deletes the specified participant by participantId LEAVE - Lets you remove yourself from a conversation SHRUG - Sends a ¯_(ツ)_/¯ message, or appends it to the current message.
There are various pre-built commands, however if you’re feeling particularly brave you can try making your own. That goes a bit above and beyond this article, however you can use the pre-built commands as a template if you want to get creative.
User Conversations
While not technically an object, the User Conversations API calls allow you to get a list of conversations for a given user that includes unread message count and a few other pieces of data. You can use this API call to build a list of open conversations, showing how many unread messages are in that conversation for the user.
This particular call is quite performance intensive and can contain a large amount of data, so it should ONLY BE USED ONCE ON CLIENT APP LAUNCH.
Use Cases
Creating a Working Conversation
We had to make sure that we labelled this section appropriately to avoid any confusion when we write guides in the future for how to create a completely broken conversation. Let’s create a simple direct conversation between two participants, send a message, and react to it.
Step 1 - Create the Conversation
In this step, we will assume that you’ve already used something like GET /users to obtain the userId’s for the participants in your conversation. We’ll use the following call with request body:
POST /conversations
{
  "stream": false,
  "hidden": true,
  "generateSystemMessages": false,
  "originalParticipants": [
    {
      "type": "USER",
      "participantId": "22d77ed5-770d-4044-8b48-0084cedec7ae"
    },
    {
      "type": "USER",
      "participantId": "db4a5a46-96fe-4a6c-93de-e60d719aee98"
    }
  ]
}
Step 2 - Send a Message
In this step, we’ll take the conversationId that would have been provided in the response body when we created the conversation. We’ll use the following call with request body:
POST /conversations/{{conversationId}}/messages
{
  "body": "Hello World!",
  "contentType": "text/plain"
}
Step 3 - React to the Message
In this step, we’ll take the messageId that would have been provided in the response body when we created the message, and we’ll also use the conversationId from the prior steps as well.
POST /conversations/{{conversationId}}/messages/{{messageId}}/reactions
{
  "reaction": "😊"
}
Optional Steps
There are a lot of other things that you can do if you’re working with your own chat client, such as:
Update the “lastReadMessageDate” property for the Participant when they read the message
Indicate when a Participant is typing
Action Cards
One of the interesting things that you can do with applications that support it (e.g. MiCollab) is to make use of interactive action cards with buttons. The following document provides detailed instructions with examples of how to create both simple and advanced action buttons : Chat API - Message Content Types
Media API Guide
When a PBX is connected to CloudLink through a supported CloudLink Gateway, the Media API can be used to perform basic call control, manage conferences, and access call records and recordings.
Note: You cannot currently play media, control a softphone, or access PBX configuration.
Architecture
Most of you are going to gloss over this, but kudos to those of you who don't! Understanding how the basic workflow for Media call control works is extremely useful for getting the most out of the API and understanding what you can and cannot do.
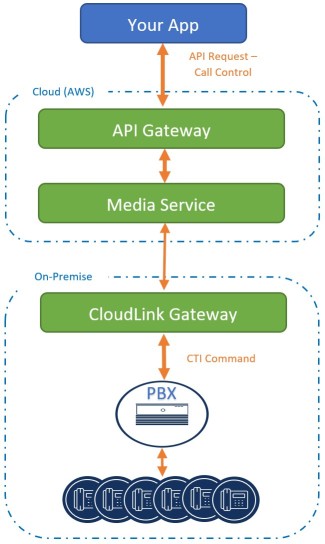
The above is heavily oversimplified but it does illustrate how an API request to perform a call control action works at a very high level. Once the Media API receives the request, it communicates with the CloudLink Gateway which in turn translates the request into the appropriate CTI commands and issues them to the PBX.
Object Model
The following is a high level overview of the resources/objects and their properties that you can manage with the Media API. This is meant to serve as a general reference and the full API documentation should always be referred to for development purposes.
Endpoints
Accessed through /endoints/{endpointId}, an endpoint in the context of the Media API typically refers to an extension or physical phone and will have a unique EndpointId that typically equates to the dial-able extension. The Endpoint is accessed directly when reading it's properties or managing line state, whereas call control is managed with the 'Calls' sub-resource.
Key properties for Endpoints are:
endpointId - The unique identifier (system generated) for the endpoint, typically this is the extension of the phone.
state - The line state of the phone (idle, ringing, connected, etc). This is typically read-only.
userAvailability - The availability of the user/extension (available, busy, DND, away). This is used to control line state outside of an active call.
Calls
Accessed through /endpoints/{endpointId}/calls and considered a sub-resource under Endpoints, a Call represents a unique phone call on a unique endpoint. When performing call control you are managing the Calls resource directly typically using an action (hold, transfer, answer, etc) and occasionally additional properties depending on context such as a destination (to). The Calls resource itself has quite a few properties, but of key importance are:
callId - The unique identifier (system generated) for the call
from - The caller's extension (internal) or phone number (external)
to - The targeted/receiving party for the call
state - The current status of the call (ringing, connected, completed, etc)
cause - Additional context for the current state (newCall, busy, callNotAnswer, etc)
Call History
Depending on the use case, the Call History resource is accessed through /calls/records or /calls/{callId}/records and provides access to call records tied to a specific Endpoint or for a specific Call referenced by CallId.
Conferences
Accessed through /conferences, the conference resource will allow you to integrate with applications such as MiTeam Meetings and MitelOne to create and manage conference calls. While you can't exactly run your own conferencing app off these routes, they will allow you to do things like:
• Create a conference plugin for calendar applications • Create your own conference scheduling and management tools • Integrate meeting attendance records into an Human Resource Management System
An important detail to keep in mind is that a conference can be a multi-instance object. In the case of a recurring meeting, each meeting is considered an 'instance' of the same conference. You can get details of specific instances using the /conferences/{conferenceId}/instances/{instanceId} route.
Properties for Conferences are:
Id - Unique identifier for the conference. One is automatically generated if not provided (recommended).
Name - Label or title for the conference
Type - "inviteOnly" requires the participant to be invited, "everyoneAllowed" allows the participant to join as long as they have the meeting Id. Defaults to "everyoneAllowed".
lobbyPolicy - Controls the access policy for the meeting lobby. "pstnLobby" will send anyone dialing in through the PSTN into a lobby where they have to be accepted or rejected. "guestLobby" and "nonOwnerLobby" work the same way, in that guests who are not logged in users are directed to the lobby to be accepted or rejected. "noLobby" will allow everyone with the meeting Id and access code to join without first going through the lobby. Defaults to "guestLobby".
accessCodeLength - The number of digits for the automatically generated meeting access code, between 1 and 99. Defaults to 9.
expiryDateTime - The datetime that the meeting access code will expire. If not provided, no expiration is set.
participantId - the principalId of the participants, be it the user's unique userId, or the principalId provided with the /guest/token route. Defaults to include the user who created the conference.
Participants
Accessed through /conferences/{conferenceId}/participants and considered a sub-resource of Conferences, Participants consist of very little information such as:
participantId - Unique identifier for the participant, typically the 'principalId' for an object such as a User or Guest.
state - Values are, "invited", "accepted", "rejected", "active" and "inactive"
type - Indicates if the user joined from an application ("webapi") or called in from a phone ("pstn").
Recordings
Accessed through /recordings, the recordings resource is useful for obtaining recordings of conferences. At this time you cannot start/stop recording using the Media API, but you can retrieve recordings, update their metadata, and delete them. Key properties are:
recordingId - Unique identifier for the recording
callId - The unique identifier for the call this recording was generated from
contentType - The media type of the audio
label - Free text that can be added to the recording
Use Cases
Call Control
The most common use for the Media API is to perform call control actions, be it simply initiating a call or performing logic based call routing of inbound calls. There are a few requirements and caveats when it comes to call control which are important to be aware of:
If the device you are trying to control does not support CTI, you cannot control it with the Media API. This largely limits call control to physical desk phones, however other devices may have limited CTI support (such as Call Distribution Elements on the MiVO400). In some cases (like CDE on the MiVO400) you may have to enable this functionality through PBX settings.
You cannot (currently) play audio through the Media API to on-premise PBXs. This means you cannot play prompts, listen for DTMF, etc.
When performing call control with the Media API where a softphone client such as Mitel One or MOWA is being used, the client may not accurately reflect your call state and audio will not be initialized through the softphone. The physical phones being controlled will still function as expected.
Call control actions for on-premise PBXs are exclusively performed using the /endpoints route. In this guide we will assume that the endpoint is a physical Mitel IP phone. You are able to initiate a call, control an active call, determine or set the state of a phone (available, busy, dnd, away), setup call forwarding, and get active call information. Detailed guidance on some of these activities will be published in the Tutorials section of the Developer Portal, however a few simple examples are provided here.
Making a Call
The following would initiate a call from extension 2001 to extension 2002 using the "Make a Call" call, then timeout after 15 seconds if there is no answer.
POST /endpoints/2001/calls
{
   "to": "2002",
   "originateTimeout": "15"
}
Redirecting a Call
One of the more common scenarios you will encounter is the need to redirect or transfer an inbound call, modifying the destination based on some sort of logical criteria such as time of day (e.g. route to X from 0900-17:00, route to Y outside of those hours). In this example we will be redirecting a ringing call on extension 3001 to extension 4001, since transferring the call requires that it first be answered by 3001. This is accomplished with the "Change an Active Call State" call:
PUT /endpoints/3001/calls/123456
{
    "action": "redirect",
    "destination": "4001"
}
Note: The 'redirect' value is not listed in the API documentation as a valid option, however it does work and will be listed in a future documentation update.
A Note on Call IDs
The Call ID is the unique value assigned to every call. The Media API simply requires that the Call ID be a string, so the format will vary depending on the platform you're working with. For example, calls on the MiVO400 use an integer whereas calls on the Connect platform use a GUID. When initiating a call through the Media API the Call ID will be generated for you automatically and returned by the API on a successful "Make Call" request, however you do have the option of including your own "associatedCallId" for tracking purposes.
Creating a Conference
Setting up a conference is simple with the "Create a Conference" call. On creation, the Conference will automatically include an "addresses" object that contains dial-in numbers based on where the account is located. Here's an example where we create an "invite only" conference for 2 participants:
POST /conferences
{
  "name": "Cool People Club",
  "type": "inviteOnly",
  "lobbyPolicy": "pstnLobby",
  "accessCodeLength": 9,
  "expiryDateTime": "2021-12-31T16:00:00Z",
  "participants": [
    {
      "participantId": "bdbce10a-a2e5-4cc4-ab17-620f4d6c741b"
    },
    {
      "participantId": "16a52caa-df92-4f18-af0d-e479e7a5049f"
    }
  ]
}
You will notice that the response body you receive on successfully creating a conference includes dial-in numbers. These are determined based on the region/cloud where the account exists (North America, Europe, Asia-Pacific) and will almost always include a US and Canadian dial-in number by default. You cannot control which dial-in numbers are provided at this time.
Adding a Participant
If you have the conference type set to "inviteOnly" and need to add additional participants, you will need to 'invite' participants before they join which is done by adding them to the participant list of the conference. The API call is very simple, here's where we add a single participant to an existing conference with a conferenceId of '5344397d-f93a-43e2-a009-c1559fb4b394'.
POST /conferences/5344397d-f93a-43e2-a009-c1559fb4b394/participants
{
   "participantId": "16a52caa-df92-4f18-af0d-e479e7a5049f"
}
Meeting Attendance
A potentially useful component of the conferences resource is the ability to determine which conferences a user has attended. There are two API calls which offer similar data, albeit with a few differences:
GET /users/{userId}/conferences GET /users/{userId}/attendance
The data returned by these two calls can include detailed information about not only which conferences the user attended, but who else attended them, if there are recordings, and what time the user joined and left the conference.
Line State Management
You can control the state of supported phones via the Media API, primarily to put the phone in Do Not Disturb. There are two different albeit similar properties you can use:
action - Values are:
dnd - Sets Do Not Disturb on the phone. Functions as a toggle, make the same API call to turn it on or off.
messageWaiting - Lets you toggle the 'message waiting' lamp on physical phones
pstnRouting - Not used
userAvailability - Allows you to set the user availability in apps that use or support this feature. Values are, "available", "busy", "dnd", and "away"
Notifications API Guide
Often referred to simply as 'Notify', the Notification API is one of the most useful services that you can leverage within CloudLink, enabling you to subscribe to notifications for a wide variety of events. A few examples of the types of events you can receive notification of:
Call events (e.g. ringing) on supported Mitel phones
Chat events in CloudLink enabled applications like MiCollab and MiContact Center Business
User presence changes
Notifications are sent in JSON format and can be received as either webhooks (for server apps) or websocket notifications (for client apps). Using a "Pub-Sub" model, applications and other APIs can record an event in Notify as a 'Publication' resulting in a notification for any other application that has a 'Subscription' that has search/filter terms that match the Publication.
Object Model
Publications
All of the CloudLink APIs create their own publications whenever they carry out an action, and most Mitel apps will do the same. Simply put, publications are how you let the Notification API know that an event has occurred. From there, other apps and services can be notified of that event if they have created a subscription that matches the properties of the associated publication. Conveniently, you can use the Notification API to create your own publications.
Why would someone do that, I pretend you asked? It’s a convenient way to handle certain server-to-client or even client-to-client communications. For example, someone opens their client app and uploads a file to share with other team members. That client app creates a publication of that upload event, and all other clients who have a subscription that matches the properties of that publication will be notified that a shared file was uploaded.
The call to create a publication is pretty straightforward. The mandatory fields in the request body are:
Topic - This is the highest level of detail in the publication and typically works as an app/service identifier. For example, “App-User-Chat” could be the topic for any events that my custom chat app publishes to the API.
Method - This equates to the REST operation that was used for this event, such as PUT, POST, or DELETE. If the event wasn’t a REST operation, you can use something else that makes sense in the context of your app.
Subject - The subject typically refers to the resource that you completed the action on. The other APIs will typically use the path of the resource (e.g. /conversations/12345/messages/10004).
Content - The actual content of the publication which can be in just about any format you like, including JSON.
There are some other fields in the request body that are optional, such as the AccountID or PrincipalID that act as a sort of signature on the publication (Customer and User, respectively). You can also make use of the PrincipalFilter to control which users will receive a notification for this specific publication, provided that they have a subscription for it in the first place.
Subscriptions
When working with the Notification API, most of the time you’ll be just creating Subscriptions to events that are being published by existing apps and services. When using POST /subscriptions you will have 4-5 filter fields in the request body that must be populated to create a basic Subscription. The first three are simple:
ApplicationID - This is a unique ID specific to your app that’s required if you’re using a webhook (as opposed to a websocket). You can generate this yourself, just make sure it’s unique, so something like a 128-bit GUID is a good choice. The ApplicationID will be used as a key to encode the body of the webhook, which is then included in the “x-notify-signature” header of the webhook. This essentially acts as a signing key for trust purposes, so you can verify that the webhooks you receive are legitimate. Since you cannot decode the signature, you will need to encode the body of the webhook yourself with SHA256 using the ApplicationID as the key and then compare with the content of the “x-notify-signature” header.
DeviceID - For webhooks, this is the target URL for notifications to be delivered to (your server). For websockets, this is the client id you (or your library) created when establishing the MQTT connection.
Transport - This will need to be either “websocket” or “webhook” as appropriate.
Now, we have to actually decide what we’re subscribing to. We do that by creating filters for the Topic and Subject of the publication. You can filter on other values as well, but these two are the important ones and require a bit more explanation that the other fields:
Topic - The Topic is typically a service identifier. The service identifiers for the CloudLink APIs are:
Admin API = platform-api-admin
Chat API = platform-api-conversations
Media API = platform-api-media
Presence API = platform-api-presence
There are identifiers for other APIs and Mitel apps, but the above should cover the vast majority of use cases. If you need to find a Topic to subscribe to for something else specific, let us know here in the forum.
SubjectFilter - Typically equates to the operation/resource path.
For example, when the Chat API is used to send a message the subject would be:
/conversations/{conversationId}/messages/{messageID}To ensure that you’re subscribing to the correct publication, you’ll want to make use of Regular Expression (RegEx) filters. For example, the following expression would subscribe you to all events pertaining to messages in conversationID 12345:
/conversations/12345/messages/[^/]+$A good third party resource for building and testing RegEx filters: https://regex101.com/.
Other Fields - There are other fields which you can optionally include, such as a filter on the Method (PUT, DELETE, etc).
You can filter on the actual Content of the publication by using publicationFilter, however the content schema varies depending on the notification so you will need to test first without this filter to first obtain a notification that contains the relevant schema.
You can also set a time to automatically expire the subscription with expiryDateTime.
Most of the other fields pertain to specific Mitel mobile apps and cannot be used at this time.
Transport Methods
Webhooks
Used for server-server communication, the connection is not persistent. When a notification needs to be sent by the Notification API, it is pushed to the endpoint (URI, IP address, etc) defined in your Subscription. When you have a sever application that needs to receive notifications and action them accordingly, this is the transport method to use.
WebSockets
Used for server-client communication, the connection is persistent and typically maintained throughout the client session. The WebSocket connection is made prior to creating the Subscription. When you have a client application that needs to receive Notifications directly from the Notification API, this is the transport method to use.
While this topic doesn’t cover the witchcraft involved with creating/opening a WebSocket, you can obtain the WebSocket URL with the connections route:
POST https://notifications.api.mitel.io/2017-09-01/connections
The Notification API uses MQTT, so using an MQTT library for your chosen programming language is recommended to help establish the websocket connection. Some further guidance is available here: WebSockets - Basic Workflow
Use Cases
Screen-Pop & Call Data
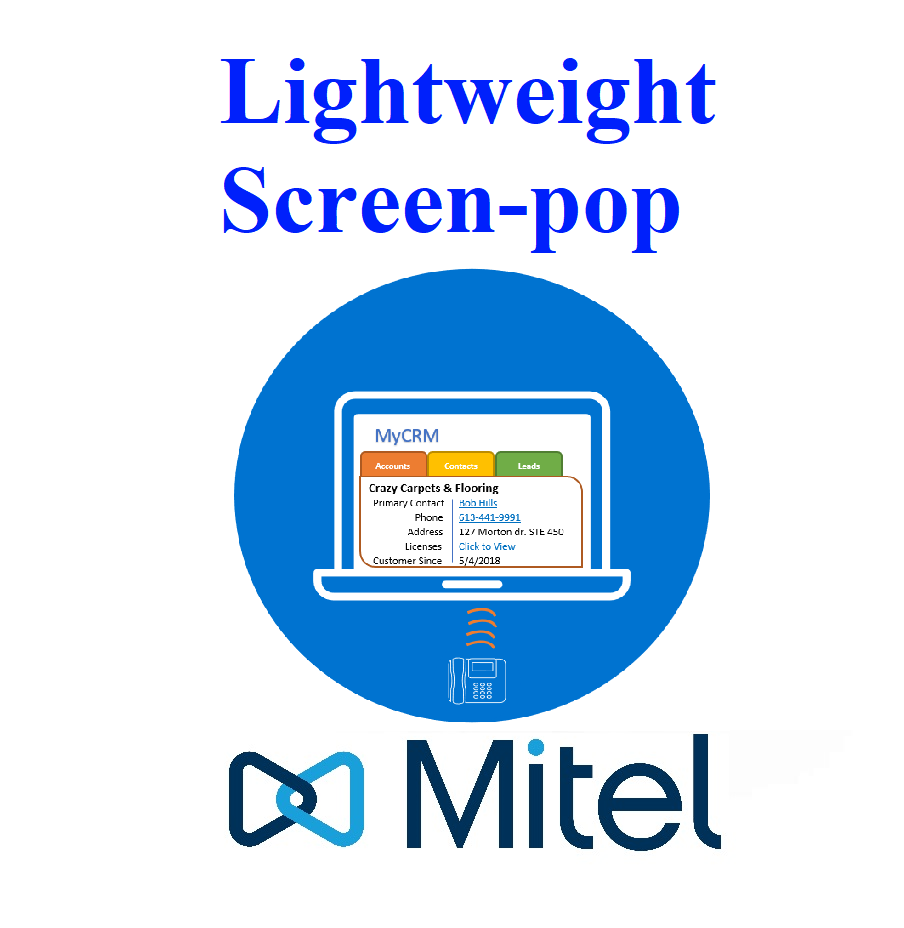
The most common use case for the Notifications API is to obtain call data about incoming calls, which then allows context sensitive actions to be taken within your application or integration. For example, you can create a simple screen-pop on a user's workstation that contains information about the caller.
A tutorial is available that walks through how to create a Subscription for all ringing calls on a particular extension. The data provided can be used as required and even supplemented with additional information about the caller from a third party database (such as a CRM platform).
Call Routing
In conjunction with the Media API, you can determine when a call is ringing on a particular endpoint and then re-route it as desired. A tutorial is available that walks through how to create a Subscription for all ringing calls on a particular extension. You can also choose to:
Monitor a range of extensions, for example on extensions 1000 to 1005:
POST /subscriptions
{
	"deviceId": "5f24b3093e7f2356318fde4",
	"transport": "websocket",
	"topic": "platform-api-media",
	"subjectFilter": "^/2017-09-01/endpoints/100[0-5]"
}
Author's note: My regex is not great, the above example is purely illustrative
Monitor for different call states, for example a state of 'ended' on extension 1005:
POST /subscriptions
{
	"deviceId": "5f24b3093e7f2356318fde4",
	"transport": "websocket",
	"topic": "platform-api-media",
	"subjectFilter": "^/2017-09-01/endpoints/1005",
	"publicationFilter": "$.publications[?(@.content.state == "ended")]"
}
The Media API Use Cases includes information on how to redirect an active call with Changing an Active Call State.
Call Logging
Call information can be logged to a third party database for any desired purpose. A tutorial is available that walks through how to create a Subscription for all ringing calls on a particular extension, however you can also choose to:
Monitor a range of extensions, for example on extensions 1000 to 1005:
POST /subscriptions
{
	"deviceId": "5f24b3093e7f2356318fde4",
	"transport": "websocket",
	"topic": "platform-api-media",
	"subjectFilter": "^/2017-09-01/endpoints/100[0-5]"
}
Author's note: My regex is not great, the above example is purely illustrative
Monitor for different call states, for example a state of 'connected' on extension 1005:
POST /subscriptions
{
	"deviceId": "5f24b3093e7f2356318fde4",
	"transport": "websocket",
	"topic": "platform-api-media",
	"subjectFilter":"^/2017-09-01/endpoints/1005",
	"publicationFilter": "$.publications[?(@.content.state == "connected")]"
}
Chat Integrations/Automation
While you can use the CloudLink API to integrate a third party application with any Mitel application that uses CloudLink chat, if you want your application to know when someone else initiates a conversation or sends a message, you'll need to use the Notification API.
The following would create a subscription that will result in notifications for any new messages in a conversation where your app (or user) is a participant.
POST /subscriptions
{
	"deviceId": "5f24b3093e7f2356318fde4",
	"transport": "websocket",
	"topic": "platform-api-conversations",
	"subjectFilter": "^/conversations/[^/]+/messages/[^/]+$"
}
To filter on the specific content of a chat message, you will need to search within the schema of the content object. Since the schema of the content of a notification is determined by the application or service that created the publication in the first place (the app that generated the notification), it is not consistent and and so testing with a more open subscription like the one above is recommended as a first step. The following is an example of creating a subscription to listen for a specific message of, "agent".
POST /subscriptions
{
	"deviceId": "5f24b3093e7f2356318fde4",
	"transport": "websocket",
	"topic": "platform-api-conversations",
	"subjectFilter": "^/conversations/[^/]+/messages/[^/]+$",
	"publicationFilter": "$.publications[?(@.content.body== 'agent']"
}
User Provisioning Automation
When connected to a CloudLink Gateway, users on the PBX are synced to CloudLink automatically where they can be accessed by the Admin API. While you can run a scheduled task to pull user information, you can also be notified in real-time of new users by leveraging the Notification API. For example, the following will create a subscription that notifies every time a new user is created in the specified account:
POST /subscriptions
{
	"deviceId": "5f24b3093e7f2356318fde4",
	"transport": "websocket",
	"topic": "platform-api-admin",
	"subjectFilter": "^/accounts/10000495/users",
	"methodFilter": "POST"
}
Note: This would only cover new users, not updated users as this requires a methodFilter of "PUT".
Presence API Guide
The concept of presence in Unified Communications can be a bit tricky. If I’m running 5 different apps, a softphone, and a physical set that all have their own status…how do you manage all that? The Presence API does a lot of the work for you automatically, while still giving you control if you want to modify the way that presence is handled in your application.
The primary component of the Presence API is the Presentity. A combination of "presence’ and “entity”, a presentity is any object that has presence information associated with it. In the context of this article, this typically refers to a user but it can also refer to groups and other objects.
Object Model
Presentity
The core object of the Presence API, Presentities have a few key properties with the 'presences' objects being particularly important:
principalId - Refers to the unique identifier for the presentity. Will typically be the userId of the user object, however can also be a groupId or other identifier for an object that can have presence.
accountId - The CloudLink account where the presentity resides.
type - One of three values: user, group, external.
presences - Consists of two objects, the 'Aggregate Presence' and the 'Principal Presence' described below.
links - Contains the URI for the sources contributing to the Aggregate Presence, the source that was used to determine the aggregate presence, and the presentity itself.
Presences
Aggregate Presence - This is set by an algorithm that the Presence service uses to decide what the appropriate presence should be based on the status of all the various sources that are assigned to the presentity. Different sources will have different ‘weight’ that is taken into account by the algorithm, depending on the category of the source. Before you ask, this algorithm is highly classified and we can’t tell you how it works.
Principal Presence - This is an override that you can set which will disable the aggregate presence algorithm and set both the principle presence and the aggregate presence to whatever status you indicate. The aggregate presence will only resume using the algorithm when you set the principal presence back to ‘Available’.
Both presence types can contain the following properties:
Status - Available, Unknown, Offline, Busy, DoNotDisturb, Away
Reason - Free text field allowing you to provide context around the current status. Some apps may display this information (like an away message), others ignore it entirely.
EnteredOn - The datetime of the status change
Extended - Free JSON field allowing you to provide your own additional information. Used by various apps for different purposes, such as PBXs attaching the CallId when changing status on starting an inbound/outbound call, or inserting an incremental sequenceId to help order status change events when they are being fired off very quickly and are potentially being received out of order.
Sources
Sources are often created automatically by other apps and services, a good example being an extension assigned to a user. Sources are grouped by category which factors into the algorithm used to set Aggregate Presence, with sources in the same category treated equally. The available categories are:
phones - Extension, SIP line in a web app, really anything telephony related
externalEngines - This is presence supplied by third parties, like presence engines in certain PBXs, or other apps that want to feed presence information into the Presence service.
acd - Related to contact center, such as agent state, queue state, etc.
calendar - Not currently utilized, but you might see it referenced.
The source object itself consists of the following key properties:
principalId - Reference to the associated principal (i.e. user)
categoryId - Valid options are: phones, externalEngines, acd, calendar.
sourceId - Unique identifier for the source. Must be provided on creation, 128-bit GUID recommended.
presence
status - Available, Unknown, Offline, Busy, DoNotDisturb, Away
reason - Open text field, can include an away message or similar info
Locations
While locations are currently available to be used with the Presence API, at the time this article was written, they are not currently utilized by any Mitel applications or services. Since location information cannot be changed once set (it will expire after a set period), it is not recommended to use this component of the Presence API at this time.
Use Cases
For most potential Presence API use cases, you will only be reading and updating presentities. While you can create and delete presentities, this is typically handled automatically.
Keep in mind that updating the Principal Presence on a presentity doesn’t typically change the presence on the sources (e.g. phones) that are assigned to the principal (i.e. user). If you built an app where you can set your status to ‘Do Not Disturb’, and did this by setting the Principal Presence to ‘Do Not Disturb’, you may prevent other users from contacting you through your app, but your phone (as a source) would not be impacted. Typically you would need to set the status for each source using the appropriate API, such as using the /endpoint path in the Media API to set the state for a specific extension.
Determining Presence
Note: Notifications of presence updates can be obtained using the Notification API
By using GET /presentities, you can obtain data on all presentities that your user has access to. By using GET /presentities/{principalId}, you can obtain presence data for a specific presentity (typically a user).
Important: You should typically use the Aggregate Presence. This will give you the best idea of what the ‘overall’ presence is, and in the event that the Principal Presence has been set, it will update the Aggregate Presence anyways to be the same.
If you need to get status for a specific source, you can do this with GET /presentities/{principalId}/categories/{categoryId}. Since the categoryId consists of relatively static values such as ‘phones’ or ‘ACD’, this is feasible with one API call. That said, since the categories are subject to change, a better practice would be the following:
Use GET /presentities/{principalId} and determine the available categoryId values from the URIs provided in the _links/categories fields.
Updating Presence
When you need to update presence, there are two ways to typically handle this depending on what it is you’re trying to accomplish:
Option 1 - Flow Up
If you’re trying to set status across multiple apps and devices, you will want to update the presence or state of the appropriate sources directly. This doesn’t mean updating the source object in the Presence API, but actually changing the state of the device that source represents. This could be mean using the Media API to update an extension's state, updating status of an application that contributes to presence. These states will then 'flow up' to the Aggregate Presence of the Presentity and it will be calculated accordingly.
In theory you could change the status on the source object, but that approach isn’t reliable since it’s not a true reflection of the status of the ‘root entity’ and can be overridden by that entity at any time.
Option 2 - Override
You can override presence by setting the Principal Presence. This can be useful if you just want to set the status in your app without impacting the status of other sources, with the understanding that all other apps that use the Aggregate Presence to determine status will be impacted until you remove the override by setting the Principal Presence to ‘Available’. As such you need to be very careful about using this method.
Here's an example of setting a Principal Presence of 'busy':
PUT /presentities/{principalId}
{
  "status": "Busy",
  "reason": "Out to second breakfast"
}
Creating a Source
Typically if you are deploying an application where you can set status, you will also want to create a Source for that application. Here's an example of adding your application as a source then updating its presence:
POST /presentities/{principalId}/categories/apps
{
  "sourceId": "9211a512-445b-4211-8df6-034e3c1d5067",
  "presence": {
    "status": "Available"
  }
}
PUT /presentities/{principalId}/categories/{categoryId}/9211a512-445b-4211-8df6-034e3c1d5067
{
  "status": "Offline",
  "reason": "PC caught fire and exploded"
}
Service Delivery API Guide
The Service Delivery API provides access to subscription and product information, allowing Mitel Distributors to integrate information for their resellers into an ERP solution. The Service Delivery API uses CloudLink Authentication to obtain a token, specifically through the OAuth 2.0 grants.
The Service Delivery API is effectively a ‘read only’ service that provides access to:
Agreements – Analogous to subscription contracts, the agreement resource contains detailed information about a particular reseller’s subscription(s) and references its associated products.
Products – Provides details of a Mitel product or SKU, including details such as pricing (regular and discount pricing) and user licenses that were agreed to on purchase of the product.
The Service Delivery API is inspired by the Product Inventory Management API REST Specification (TMF637) from TMForum.org, therefore the naming conventions for for various objects and properties may differ from typical Mitel nomenclature.
Coming Soon
This section outlines the planned future functionality of the Service Delivery API.
Disclaimer - This information is provided as a courtesy and does not constitute a guarantee of service. Planned functionality is subject to change and the delivered service/product may differ from what is described here.
Phase 2
This phase centers around updating the subscription contract through order submission. Through the Service Delivery API, distributors will be able to place orders to:
Create subscription contracts with a new product
Add/Remove product from a subscription contract
Update a subscription, increasing or decreasing seats for the subscription
Enable/Disable auto-renew on a subscription contract
Search for orders both current and past, based on the following search parameters
Customer account number
SAP Order number
Purchase Order number
CPQ Tracking ID
Distributors will also be able to view quotes created through the Mitel Store.
The full API Specification file for Phases 2 and 3 can be downloaded here.
Phase 3
This phase centers around Invoice management. Through the API, distributors will be able to:
View a billing invoice and details related to it:
Invoiced line items
Payment information
Billing accounts associated with the invoice
The subscription agreement associated with the invoice
Search for billing invoices based on the following search parameters:
Billing period
Subscription number
Payment status (overdue, paid)
SAP order number
Purchase Order Number
Bill Number
The full API Specification file for Phases 2 and 3 can be downloaded here.
Getting Started
The expectation is that anyone using the Service Delivery API is a Mitel distributor and as such will already have the necessary account information. If you are not already a Mitel distributor or partner, please reach out to us through here.
Authentication
The OAuth 2.0 grants (grant_type = password) are used to obtain the bearer token necessary to use the Service Delivery API. The user’s CloudLink account is mapped to an associated account in Mitel’s ERP system which ensures that the user may only obtain information about subscriptions within their account and provides near real-time access to product information.
Agreements
Agreements are a TMForum concept that is analogous to Mitel’s concept of Subscription Contracts. Agreements contain high level information such as:
Id – The unique identifier for the agreement
initialDate – The date the agreement was created
Status – The current validity of the agreement
agreementPeriod – The start and end dates for the subscription/agreement period
agreementItems – The products associated with the agreement, including pricing and license count
engagedParties – Information about the accounts/organizations involved with the agreement.
There is a considerable amount of information available within the Agreement resource. For more information, please see the Service Delivery API reference.
Products
A product is the actual billable item associated with an agreement. There is considerable information available about each product, but the commonly useful properties are:
productSerialNumber – Any serial number associated with hardware or software packages
Id – The unique identifier for this specific instance of this product. Note this is NOT the equivalent of a SKU.
productPrices – The base pricing and any pricing alterations (i.e. discounts).
For more information, please see the Service Delivery API reference.