
Overview
The information contained within this section is currently under development and several tutorials may not be available. The listed tutorials are example placeholders only and may not accurately reflect the tutorials that will be available from Mitel for the CloudLink API. If you wish to propose the creation of a specific tutorial, please make your request in the Developer Forum.
Media API
Call Control
The Media API allows you to perform call control actions (answer, transfer, etc) on a supported device connected to a CloudLink-enabled PBX. In this tutorial we will assume the role of two different custom applications:
Centralized Call Routing Application - Listens to a range of endpoints that handle all inbound calls, then routes to a specific extension based on the caller's area code.
Client Call Control Tool - Runs as a lightweight tool on user desktops, allowing for the ability to perform basic call control on their phones and keeps a record of all calls.
Step 1 - Notifications
The first logical step in most inbound call routing scenarios is to be made aware of the call. This tutorial does not include instructions on how to use the Notification API to receive a webhook or websocket event, so please see the Notification API Guide and the Incoming Call Notification sample code for more information.
Here is an example of a webhook received for an inbound call on extension 200:
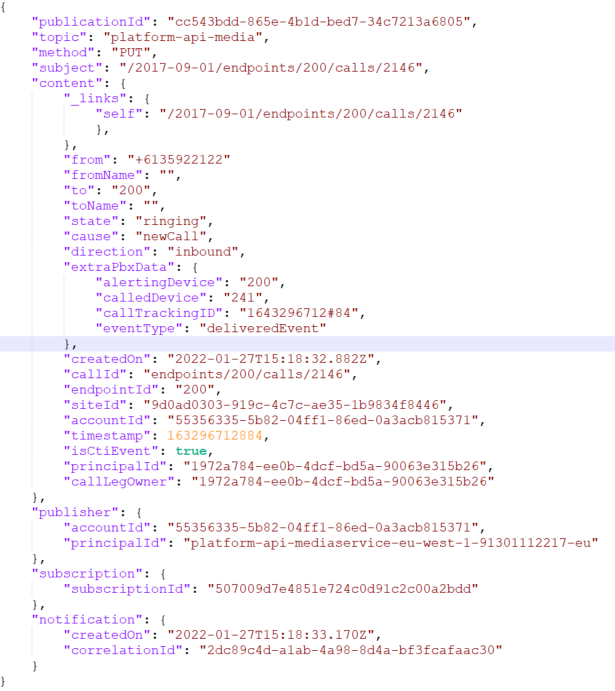
In this tutorial we will assume that your "Centralized Call Routing Application" has already received a notification for an inbound ringing call for extension 2880 with a callId of 23.
Step 2 - Redirecting the Call
Once you're aware of the ringing call, we can redirect it to the desired extension. Let's assume that your "Centralized Call Routing Application" is configured to route everyone from area code 613 to extension 2881. To do this, we'll make use of the endpoint route in the Media API to Change an Active Call State.
Use {"action": "redirect", "destination": "2881" } and including the proper endpointId (2880) and callId (23) from the notification in Step 1 as path parameters:
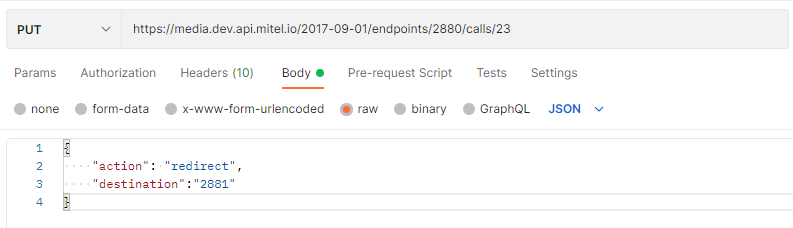
With the HTTP 200 result, we have successfully redirected a ringing call to extension 2881.
Step 3 - Answering the Call
At this stage, our inbound call should be ringing on extension 2881. Similar to the first step, we will assume that the "Client Call Control Tool" has received a notification via that the phone is ringing using the Notification API. We will assume the new callId is 31.
To answer the call with the "Client Call Control Tool" we will again make use of the endpoint route in the Media API to Change an Active Call State.
Use { "action": "answer" }, including the proper endpointId (2881) and callId (31) as path parameters:
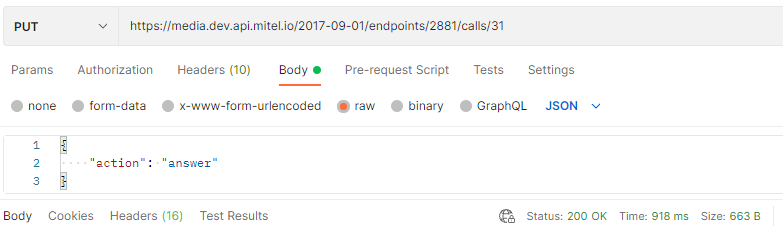
With the HTTP 200 result, the phone registered to extension 2881 will have answered the call.
NOTE: Some applications connected to the phone in 'softphone mode' may exhibit unexpected behavior when performing call control actions directly on the phone with the Media API.
Step 4 - Transferring the Call
After speaking with the caller, we've decided that they need to speak with a different individual at extension 2882 and we want to brief this individual on the caller's needs before handing them off. Completing a supervised transfer can be accomplished in two or three steps using the endpoint routes in the Media API to Change an Active Call State.
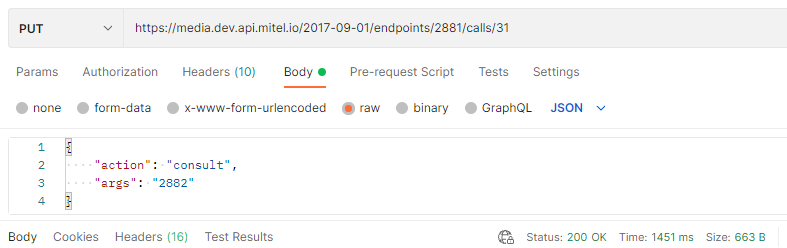
Initiate Consult Call
Use { "action": "consult", "args": "2882" } with Change an Active Call State, including the proper endpointId (2881) and callId (31) as path parameters:
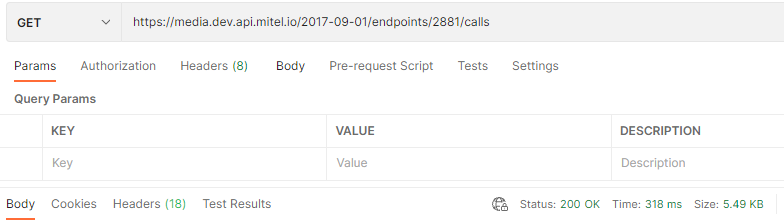
Obtain the CallId - Optional
Depending on how your subscriptions for calls are configured, you may or may not receive a new notification for 2881 with the callId for the consultation call that you just initiated with 2882. If you did not, you will need to List Active Calls for 2881 to obtain the neccessary callId for the next step. We will assume that you have obtained a callId of 32.
Complete Supervised Transfer
When 2881 is finished speaking with 2882 and is ready to complete the supervised transfer and merge in the external caller we will use { "action": "supervisedTransfer", "args": "31" } with Change an Active Call State including the proper endpointId (2881) and callId (32) as path parameters.
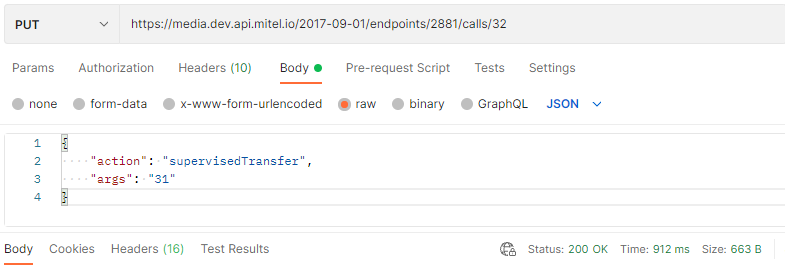
With the HTTP 200 result, you will have successfully completed the supervised transfer with the external caller now speaking with 2882, and 2881 having been successfully disconnected.
Conversation API
Create Stream Conversation
Creating a basic, functional chat conversation with the Conversation API is a straight forward process. Broadly speaking, there are two types of chat conversations that you can create:
Stream - Commonly known as a 'group chat', these can be private (invite only) or public.
Direct - A private chat between two specific users
If you haven't already, we recommend reading through the Conversation API Guide which includes instructions on how to create a simple direct chat conversation between two users. In this tutorial we will create a public Stream conversation with several users, using the following tools:
Postman to make the API calls (a Postman library for the Mitel API is available here)
MiVoice Office Web Application (MOWA) as our chat client
Note: The screenshots from Postman use variables, indicated by the values encapsulated in orange/red double braces. In practice you will need to ensure these variables are populated if you're using the Mitel API Postman library, or replace them with the variables with the actual values.
Step 1 - Get User Info
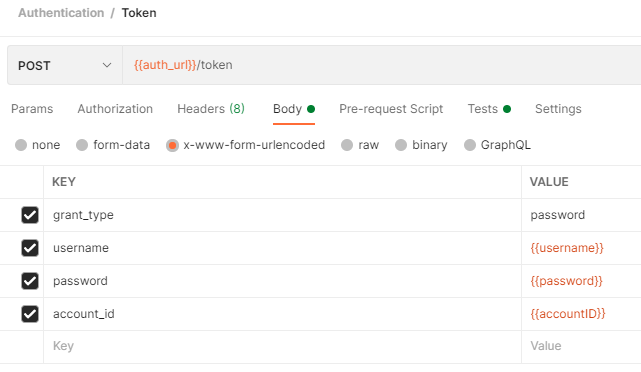
The very first thing you will need to do, is use POST /token to obtain a token for the user, utilizing their login credentials and account ID in the body of the request:
The second thing you will need to do is get the UUID for each of the users that you wish to include in the conversation using GET /accounts/{accountID}/users or GET /users. You will want to use the $filter or $search query parameters to help you find the desired users, making note of the UserId in the response body (highlighted below):
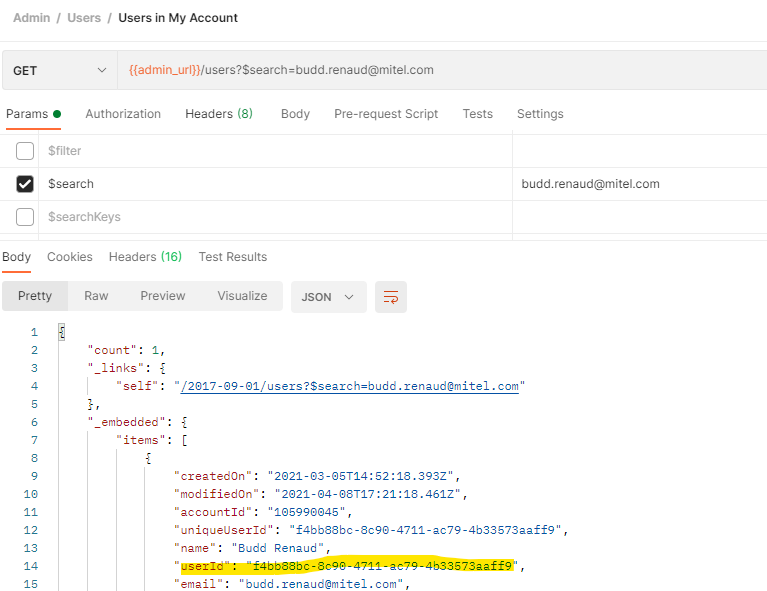
Important: The property uniqueUserID has not been broadly adopted by all Mitel applications, so make sure to use the userId instead.
Step 2 - Creating the Conversation
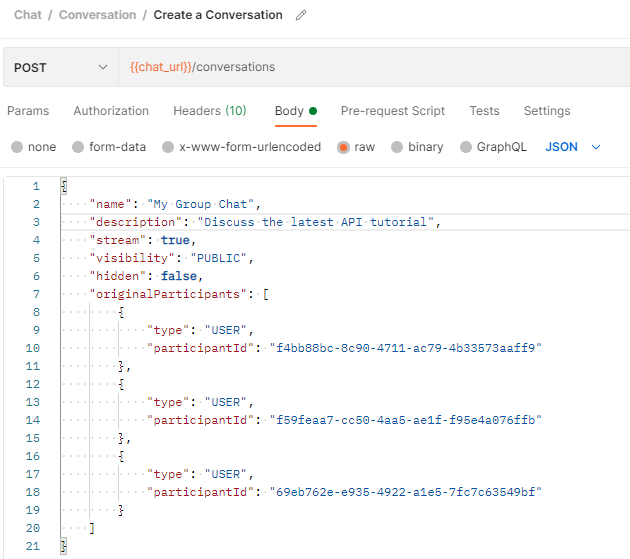
Use POST /conversations to create the conversation, using the UUIDs you obtained in Step as the participantId for each user:
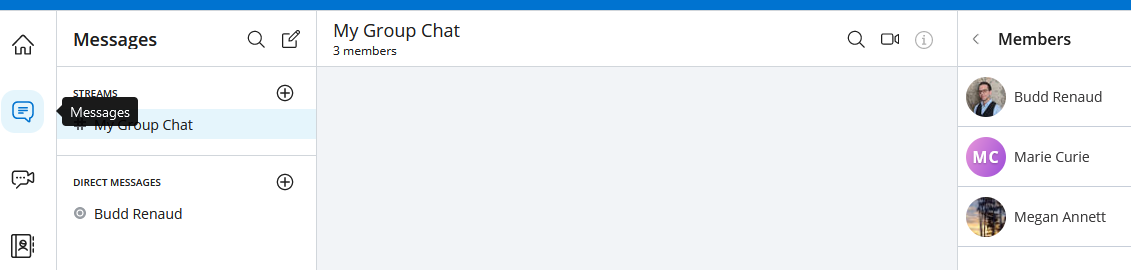
The result of the above is that you should now have a stream conversation (group chat) involving three people:
Step 3 - Add Another Participant
At this point you have a fully functioning stream conversation, but what if you want to add another participant? How you approach this will depend on which chat application you are using. For this tutorial we will follow 'standard' practices:
Once you have the UUID for the user you wish to add (see Step 1) and the ConversationId (from Step 2) you can use POST /conversations/{conversationId}/participants to invite them to the conversation:
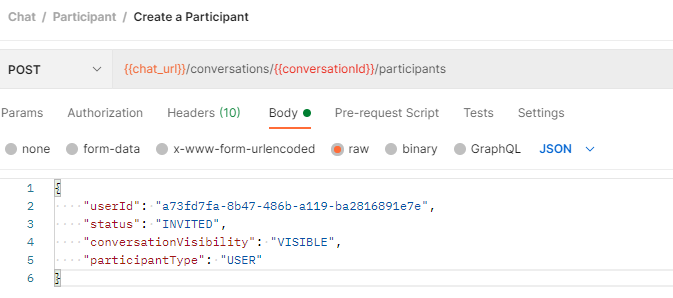
Depending on which chat application you are using, you may wish to skip the invitation step and simply add the user directly to the conversation by setting the status in the request body to "ACCEPTED".
Note on MOWA: This application handles adding users to existing stream conversations differently. You will need to always use a status of "ACCEPTED". You may also notice that the UserId is not always a GUID but may instead be something like an email address.
Step 4 - Send a Message
To send a message using the API, you can use POST /conversations/{conversationId}/messages:
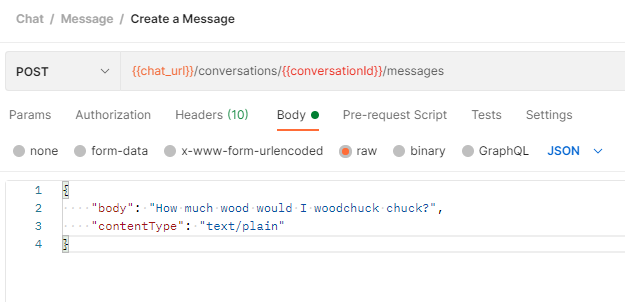
It's important to understand that the API determines who the 'sender' of the message is based on who is assigned the authentication token being used to make the API call.
While they are not shown here, there are other fields you can include in the request body when creating a message. See the Conversation API Guide for more information.
Step 5 - Create a Transcript
As a completely optional step, you can create a transcript of the conversation at any point. To do so, use POST /conversations/{conversationId}/transcripts:
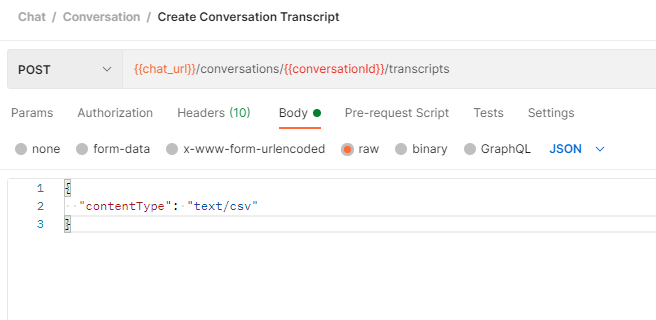
You can also elect to receive the transcript as "application/JSON" and use the additional fields of startDate and endDate to return only messages that were created within a specified time frame.
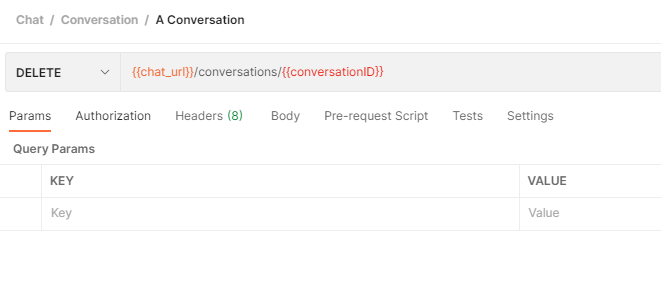
Step 6 - Delete the Conversation
As a final step, you can delete the conversation if you wish. This will delete everything related to the conversation including messages and attachments, so make sure that you only delete a conversation when you're truly ready using DELETE /conversations/{conversationID}:
Congratulations, you have now successfully created and wrapped up a working chat conversation! If you have any questions or run into any issues with this tutorial or any others, please let us know in the Community Forums.
Admin API
Create User and Group
This simple tutorial is a good way to familiarize yourself with the basics of working with the Mitel API. For this reason, additional steps are included with more detailed explanations than in most other tutorials.
When you have an on-premise PBX deployed with a CloudLink Gateway, a one-way sync occurs to bring elements such as Users and Groups into your CloudLink account. Since this is a one-way sync, best practice is to create the desired element in the PBX and let it sync to CloudLink. However, if you are interested in working with the same objects when a PBX isn't involved (e.g. Creating an organizational structure for your users), you can still create and work with those same objects to meet your needs.
In this tutorial we will walk through the process of using the Admin API guide to create Users, and a Group which they can be assigned to.
User - Represents an actual person, typically synced from the PBX.
Group - A collection of users (known as 'members'), typically used for call distribution and synced from the PBX.
First Steps
In order to make an API call, you will need to ensure that you have a valid authentication token. There are instructions available in the Building an API Call section of the Guides & Resources area, but the easiest way to obtain a token (and run any other API call) is to use the Postman Library for the API and run the POST Token API call in the Authentication collection.
If you use the Postman library, once you obtain a token it will automatically be assigned to the authentication header for all subsequent API calls. If you do NOT use the Postman library, you will need to make sure that the authentication header for future API calls is updated with the token.
Creating a User
As a general rule, the best practice for creating users is to do so on a synced PBX or through the Mitel Accounts Portal. That said, if you want to create your own automated user creation process (i.e. to sync your CloudLink account and HRIS platform) you can use the API to do so.
There are two different routes you can use when creating a user:
/users/{accountId}/users - Creates the user in the specified account. This is the recommended route to use when creating users.
/users - Creates the user in the account specified in the request body. This route has various limitations (such as the inability to specify role) and it's use is not recommended.
In the Postman Library under the Admin collection, the /users/{accountId}/users route is used by the POST Create User in Specified Account API call. This route is documented here and will be used for this tutorial.
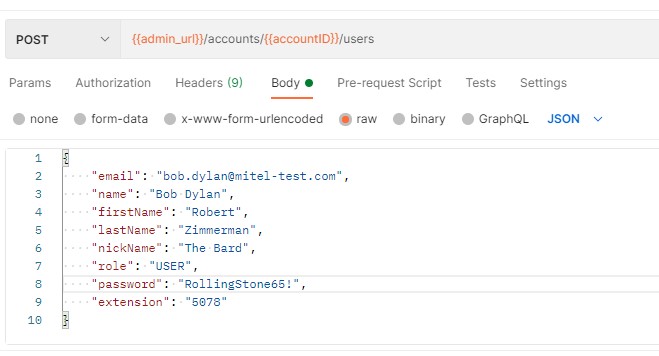
Within the request body, the important fields are:
email - This is a mandatory field and must contain a valid email address to ensure the user can receive the welcome email and activate their account.
role - Allows you to indicate if the user is a standard USER, or an ACCOUNT_ADMIN or PARTNER_ADMIN. The latter can only be assigned to users in Partner accounts and not to users in end customer accounts. If not provided, the role will default to USER. The user making the API call can only create users with the same role or lower.
The remainder of the available fields are not strictly required and are described in the Admin API Documentation: Create User in Specified Account. Best practice is to include additional information such as a name, extension, etc. Including a value for the password is not necessary, as users are required to complete a verification process that includes setting their own password. It is also strongly recommended to avoid providing a custom userId or uniqueUserId and instead allow them to be auto-generated.
Here is an example of the API call to create a user:
The response will look something like this:
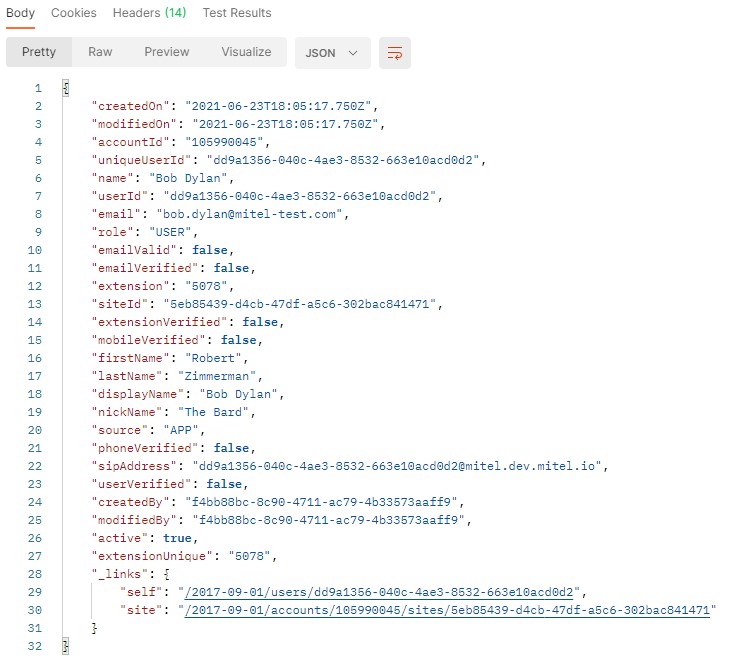
At this point, the user has been created but they still need to be verified before they will be able to login.
Verifying a User
Normally when you create a user using the Mitel Accounts Portal, or by first creating the user in the PBX and allowing it to sync to your CloudLink account, a welcome email is automatically sent asking the user to complete the setup process. If you create the user with the API, then you will need to take the additional step of sending this email yourself. The process for this is very simple to complete using the Welcome Email API Call (available in the Postman Library in the Emails folder in the Admin API Collection):
Use POST /accounts/{accountId}/users/{userId}/welcome
You do not need to include a request body, however a request body is available. Most of the parameters are specific to Mitel applications, but you can make use of:
languageCode - specify the language for the email using the BCP-47 formatted language code (e.g. en-US).
IMPORTANT: This process will be changing slightly in the future to allow a 'generic' email to be sent. Currently the welcome email uses a template for Mitel OfficeLink.
The email the user receives will include a time sensitive link to complete the setup of their account, which involves setting a password and providing a mobile number where a temporary passcode can be sent for an additional verification step. The email typically appears as follows:
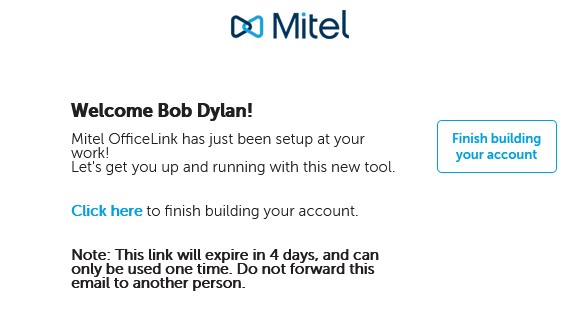
At this stage the user has successfully been created and can login to any applications that utilize CloudLink authentication (and their account is licensed for).
Creating a Group
Similar to Users, Groups are typically synced from a CloudLink connected PBX (via a CloudLink Gateway) and similar to Users the best practice is to create Groups on the PBX. However, Groups can be created using the API if you are not syncing with a PBX or otherwise want to use a Group to organize a set of Users.
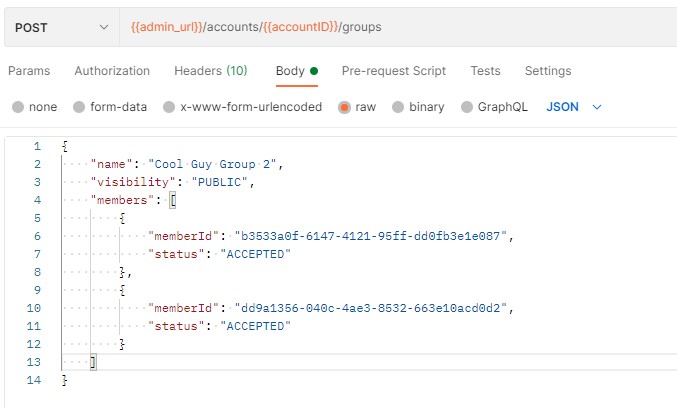
To create a Group, we will use the Create a Group in Specified Account API Call. The relevant fields when manually creating a Group are:
name - The display name of the group
visibility - PUBLIC will allow anyone to join, PRIVATE requires an admin to add additional users
members
memberId - The uniqueUserID for the User
status - Always use ACCEPTED
type - Always use USER. If left out, will default to USER anyway.
There are scenarios in which you can use different values for 'status' and 'type', but generally speaking those values are only ever used when a group is synced from a PBX. It's worth noting that some Mitel apps won't display USER groups and will often only display APP groups that synced from a PBX.
Here's an example API call to create a simple group with two members:
If you need to add additional members to the Group, you can do so using the Add Members to Group in Specified Account API Call (POST /accounts/{accountId}/groups/{groupId}/members):
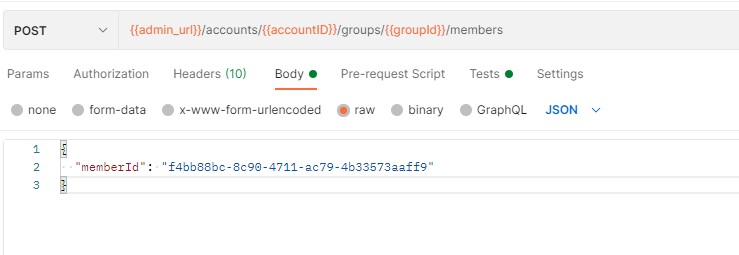
You'll notice that the field "type" that is mentioned in the API Documentation is not required in this request.
Congratulations, you have now successfully created a user, verified them, and added them to a brand new group! If you have any questions or run into any issues with this tutorial or any others, please let us know in the Community Forums.
Upload Photos
CloudLink Users have the option of setting a profile photo, either to reinforce the charade that they are human and not a terrifying Lovecraftian monster, or to show off a sweet new haircut. I assume there are other reasons to upload a photo of yourself for your colleagues to see, but I can't think of any.
While photo uploads are commonly handled through Mitel apps or through the Accounts portal, if you are building your own client applications or an integration that federates employee data between platforms, you can use the Admin API to upload, delete, and retrieve user photos. You can also upload photos for contacts which follows a similar process as outlined in this tutorial.
We're going to start with the route. There are two routes that you can use:
/users/{userId}/photo
/accounts/{accountId}/users/{userId}/photo
The first route will just infer the account based off the token assigned to the user making the API call. Basically it just assumes you're trying to work with a user in the same account as you. The second route is used when you wish to be more explicit, especially if you're a user with a PARTNER_ADMIN role. There's no practical, functional difference between the two routes however a good practice is always to be as explicit as possible so in this tutorial we will be using the second route that states which account we're working in.
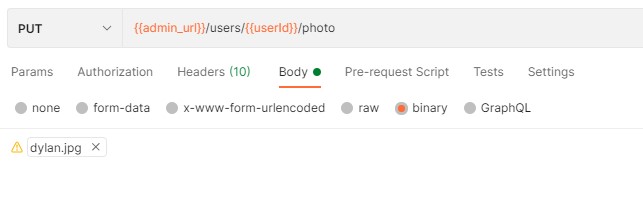
Uploading a Photo
Regardless of which route you decide to use, the method will always be PUT and the request body will always be the actual photo (if that wasn't obvious). In the case of Postman, this means the body will be 'binary' and you need to select the appropriate file:
Note: Uploading a new photo will always override and replace the old one.
Retrieving a Photo
If you're creating an app that displays user (or contact) photos, you'll need to know how to retrieve them. At first glance this seems impossible since the Admin API documentation only outlines PUT and DELETE methods for the various photo routes. The direct URL for the photos, including resized thumbnails, can be found by performing a GET operation on the user object:
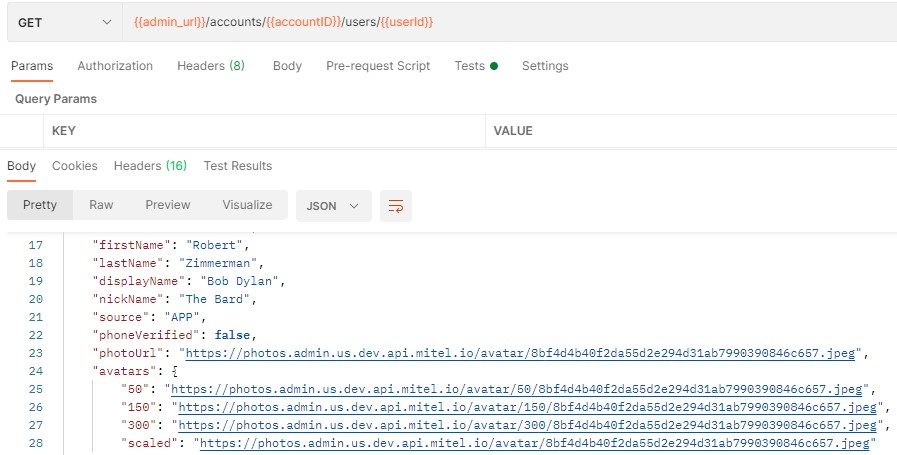
Note: If no photo has been uploaded for the user, the "PhotoURL" and "avatars" properties will not be displayed.
Deleting a Photo
When your user has made a habit of being a real jerk to everyone over chat, they might decide that they don't want people to know what they look like anymore. I'm looking at you, Frank. Deleting a photo is a very simple process, you simply use the DELETE method on the appropriate route with no request body required:

On successful deletion, you will receive a similar response to a GET /users/{userId} operation.
Notification API
When a service (e.g. Media, Conversations, Presence) or Mitel CloudLink application performs an action, that information is usually sent to the Notifications API as a 'publication'. Any other applications or services that need to be aware of that action can create a 'subscription' which will result in the Notifications API sending a notification to the endpoint defined in the subscription.
Since most services (especially the Media API) publish their actions to the Notifications API, it's a useful tool for almost everything you can build.
Incoming/Ringing Call
The Notifications API is commonly used by any integrations with (or applications for) a CloudLink connected PBX, such as screen-pop or automated call routing. In this tutorial we will walk you through the process of creating a subscription to incoming calls on a specific extension and receiving corresponding notifications as webhooks using a simple online test tool. Note - Any third party tools are used for demonstrative purposes only. Mitel does not explicitly endorse the use of Webhooks.site.
In a typical production solution webhooks are used exclusively by server applications whereas client applications should make use of WebSocket connections, however the basic premise of creating a subscription and receiving notifications is the same.
Step 1 - Creating A Subscription
When certain CTI events happen on a CloudLink connected PBX, they are sent to the Notifications API through the CloudLink Gateway so other applications and services are aware of them.
The very first step will be to use a test tool to create a URL to deliver the webhooks to, making sure to keep the window open until the end of the tutorial. We will then need to Create a Subscription with the following information:
applicationId - Generate a 128-bit GUID (described in the API Guide). GUID Generator Tool. deviceId - The URL to send the webhook to, in this case the URL provided by webhooks.site transport - Use a value of "webhook" topic - Use a value of "platform-api-media" (see API Guide) subjectFilter - The URI for the endpoint publicationFilter - Filter based on the content body, uses JSONPath. You can initially exclude this to receive more general notifications first to base on your subsequent query/filter on.
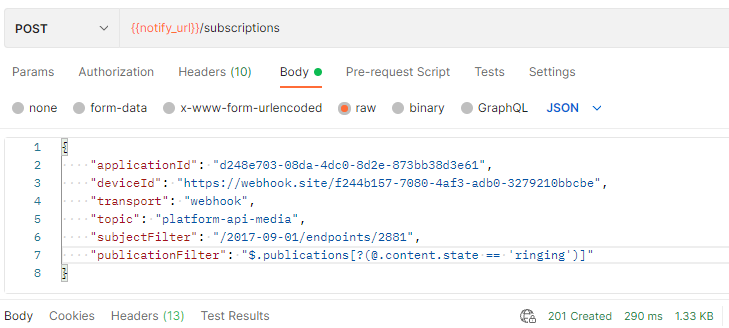
An HTTP 201 result with a corresponding response body means your subscription has been successfully created and you can start receiving notifications. You will need to take note of the 'expiryDateTime' field as if your session exceeds this time you will need to recreate the subscription.

Step 2 - Generate Ringing Event
In this example we will place an internal call to extension 2881, however an external call also result in a notification in this instance.
Step 3 - Listen for Webhook
If everything has gone according to plan, you should now receive a webhook in the test tool.
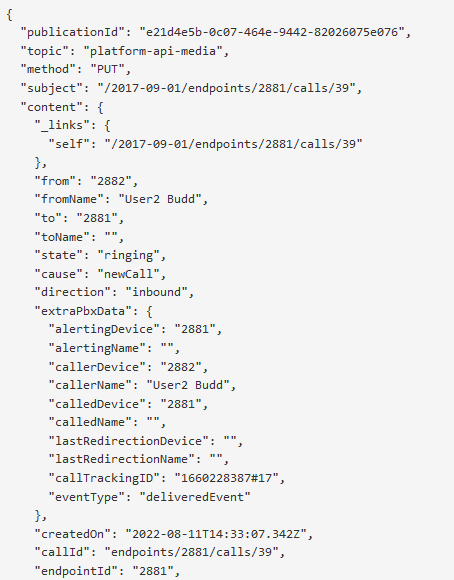
From here you can use the information to interact with the call however you see fit. For example, a server application could now use the 'callId' from the webhook to instruct the Media API to redirect the call, or a client tool that received the information through a WebSocket connection could display a pop-up window with relevant information about the caller.